What is it?
Cloudflare Access allows you to configure and enforce granular user access controls for your protected resources. Think intranet. Cloudflare's unique twist on this concept, is that rather than managing users and permissions in your application, you can manage it at the DNS-level, or what Cloudflare refers to as the "Edge".
This can have numerous benefits—a topic beyond the scope of this post. You only need to google to find resources wherein Cloudflare extols the virtues of this approach. However it does depend on one thing: that Cloudflare, and Cloudflare only is able to make requests to your origin server. Before you enable Cloudflare Access you'll want to implement some method of securing your origin server.
Note: MODX sites can use the CFAcess Extra to integrate Cloudflare Access with MODX.
The DNS Dilemma
The following illustrates (roughly) the DNS lookup process:
- Client requests a resource.
- DNS system points client to server.
- Server responds.
Notice that if the server is configured to listen for requests at an IP address, alternate domain, etc then a client can make requests through those channels as well, skipping the DNS lookup.
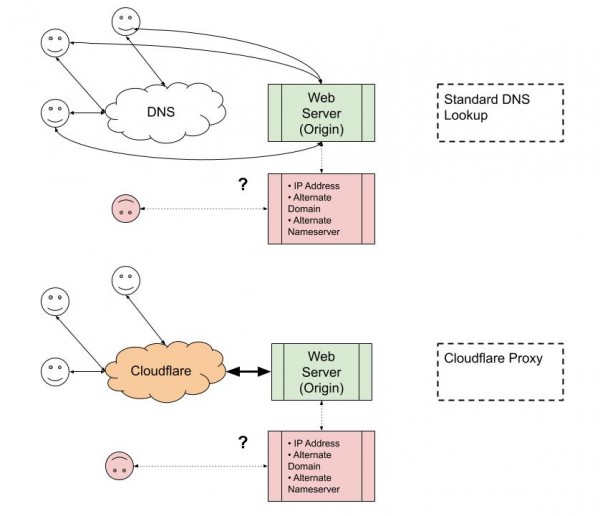
When you configure Cloudflare to be your domain's nameserver of record, and you enable Cloudflare's proxy, Cloudflare is able to do a bunch of stuff with the request before it hits your origin server, like SSL and caching static assets for faster delivery.
However, it can't guarantee that it will delegate all traffic, if the server is configured to listen for requests at an IP address, alternate domain, etc.
Some Flawed Solutions
IP Allow List
Servers can be configured with a firewall, to block requests that do not originate from specific IP ranges. Cloudflare publishes the IP ranges of their Edge servers to facilitate this and other functionality. However, this approach can be vulnerable to IP spoofing.
Also, some environments are pre-configured to restore the original remote IP address. In the case of Cloudflare, these are derived from the X-Forwarded-For or CF-Connecting-IP headers. While this is very helpful in identifying the real IP addresses of clients, in these pre-configured environments the proxy server's IP address may be unavailable, making the IP Allow List a non-starter.
Not Listening
Oftentimes webservers are configured to not listen for requests at their IP addresses, and only at the configured domains. This is very helpful for our purposes. Theoretically, clients won't be able to get a response from the server unless they go through the DNS system. One caveat to this is if a client is configured to use a local nameserver or custom DNS resolver. This can have the effect of side-stepping the Cloudflare proxy. Futhermore, if the server is erroneously configured with any additional server names (domains), then those domains will punch a hole in the dam, so to speak.
More Robust Solutions
Argo Tunnel
This is Cloudflare's recommended mechanism. The gist is, a daemon runs on your webserver that establishes persistent (semi-persistent?) private connections to Cloudflare's Edge servers. All other traffic is denied. Your server is basically guaranteed to only receive requests from Cloudflare.
There's another mechanism below that is, IMHO, almost as good and perhaps easier to set up, but before any of that, let's take a moment to bask in the glory of Internet technology in the 2020's. It wasn't so long ago that setting up a private connection with similar outcomes, required leasing a dedicated line and doing all kinds of IT acrobatics, which I won't even pretend to understand let alone be able to implement end-to-end on my own.
The fact that anyone who is a bit comfortable with the Linux command line can follow a few guides and get Argo Tunnel set up on a commodity web server within 20 minutes, is a modern miracle. Here's how you do it:
1. Enable Argo
Follow the instructions in Cloudflare's documentation. Argo can be enabled on a per-zone (domain) basis, for zones that you manage in Cloudflare. It is billed on usage.
2. Install the Daemon
You need cloudflared. However it's currently only provided as a package to download. For this post we'll be assuming Ubuntu and the .deb package file. It goes without saying that the steps demonstrated herein may not work for your case, and you really must know what you're doing before doing any of it. Consider yourself warned.
- Download the .deb package and upload it to your web server. You'll need to be logged in as
root. - Using the instructions here, run:
sudo dpkg --install cloudflared-stable-linux-amd64.debthensudo apt-get install -f
- When the installation is complete you should be able to run
cloudflared --version.
3. Login to Cloudflare
Wait, but not in the browser. Follow the instructions to log in via the command line using cloudflared like this: cloudflared tunnel login
(4 and 5) Tunnel
You can optionally set up a "Hello Tunnel" or skip to the real thing by running: cloudflared tunnel --hostname example.com http://127.0.0.1:80 (assuming your domain is example.com and your server listens on port 80.
6. Start the Service
This is all nice and cool but ideally you want Argo Tunnel to start automatically as a service. Terminate the previous process and run sudo cloudflared service install. NOTE: it's recommended to save a configuration file for the service at~/.cloudflared/config.yml. cloudflared copies that to /etc/cloudflared/config.yml and as of this writing it's unclear whether this would prevent running multiple daemons with distinct configurations on the same VM. Take special note of the config file reference documentation as any mis-configuration or syntax errors will make the Tunnel no-workey.
Using Cloudflare Workers
Using Cloudflare Workers and a bit of stock-standard web server configuration, you can attain a similar outcome to setting up a dedicated tunnel, but with less ssh-as-root-stuff.
1. Create a Worker
In the Cloudflare Dashboard, navigate to the Workers view.
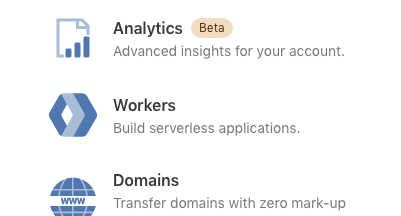
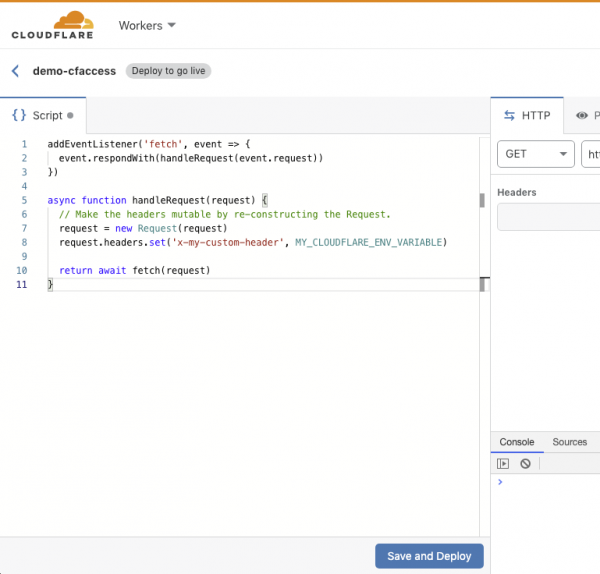
Click the "Create a Worker" button. In the "Script" pane on the left of the Workers browser-based "Quick Edit IDE", replace the code with that from the documentation for altering headers, but with one slight modification:
addEventListener('fetch', event => {
  event.respondWith(handleRequest(event.request))
})

async function handleRequest(request) {
  // Make the headers mutable by re-constructing the Request.
  request = new Request(request)
  request.headers.set('x-my-custom-header', MY_CLOUDFLARE_ENV_VARIABLE)

  return await fetch(request)
}
You can replace x-my-custom-header with whatever header you want, but it's probably best to avoid the standard ones. The MY_CLOUDFLARE_ENV_VARIABLE is the name of an environment variable that you will set in the next step, so feel free to customize the key.
When you're done the above, hit "Save and Deploy". You can optionally customize the subdomain for your Worker, at the top left of the IDE.
Back in the Workers view, select your new Worker then click "Add Variable" in the Environment Variables section. Enter they key-value pair for the environment variable in your Worker script.
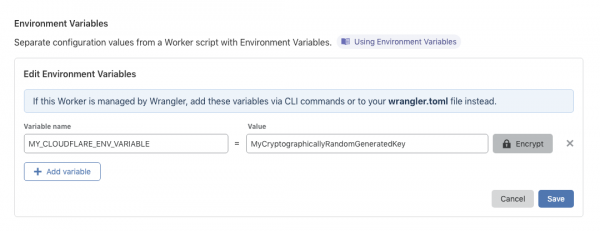
Once you save that, any route for which you've added this Worker will have your custom header added to the request cycle, when Cloudflare proxy servers make requests to your origin. IMPORTANT: protect your secret key by clicking the "Encrypt" button, and ensuring that it is stored securely at your origin!
2. Set Up a Route
In the Cloudflare Dashboard, navigate to the Workers view in one of your managed domains, and click the "Add Route" button. Configure a route and assign your new Worker to it.
3. Configure the Web Server
nginx
In a location block of your choosing (usually, and in MODX Cloud: location / before the try_files bit) add this:
if ($http_x_my_custom_header != MyCryptographicallyRandomGeneratedKey) {
    return 407;
}
replacing the header variable name and value with the ones you configured in the Cloudflare Worker. Remember, if is evil, except in specific cases. This is one of those cases.
Apache
In your .htaccess file, use the Require directive:
Require expr %{HTTP:X-My-Custom-Header} = 'MyCryptographicallyRandomGeneratedKey'
You could also do it with a RewriteCond directive.
With that set up on your server, any request that doesn't have the secret key in the custom header will be denied. Any request to a configured route in a Cloudflare-managed domain that invokes your Worker, will have the secret key in the custom header.
Configuring Access
Now for the good bit. In the Cloudflare Dashboard, go to the Access view in one of your managed domains. If you haven't set up Access before, you'll be asked to configure a subdomain unique to your account, shared across all your domains. (Pick something generic but "you".) You can add various identity providers, or simply use the default One-Time Pin (OTP) method.
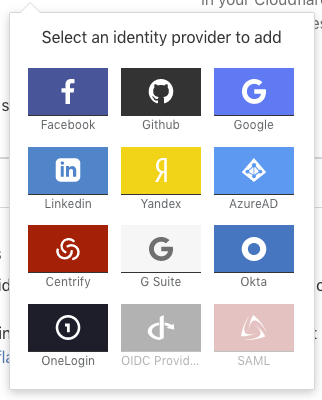
Note: as of this writing, even if you only want to use OTP, it seems you need to click on it to configure it. Even though it says no configuration needed, you need to hit "Save" before it will start working. That might be due to some error on my part but both times I've done this, those steps were required.
After the above, click "Create Access Policy" in the next section. Here's the most basic policy that only allows one email account holder to access the site:
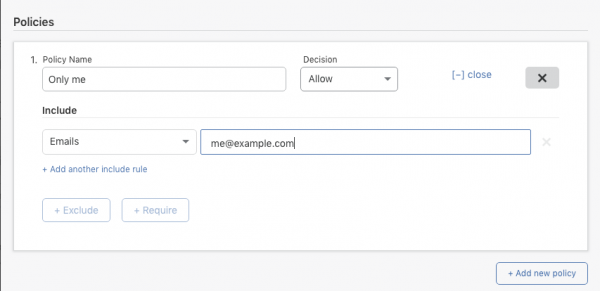
More detailed instructions are available in Cloudflare's documentation. You can do all kinds of things with Access Policies. At this point you should see the Cloudflare Access login page when you visit a protected domain/path.
Bonus Round
After all that, you can still gain additional benefits and security by validating the JWT in the Cloudflare Authorization cookie. If you're running a MODX site, there's a new Extra for that.
